For most photographers, the best time to shoot is during the golden hours – those times right around sunrise or sunset when the sky is full of drama.
For me though, the best time to shoot is a little while after all that drama happens and all the other photographers have packed up and gone home – twilight – when the skies become calm and peaceful.
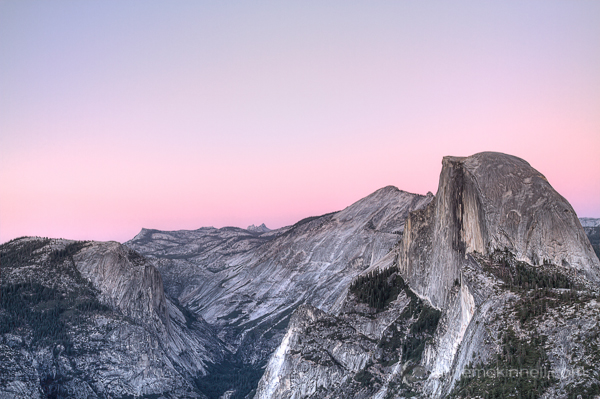
Half Dome, Yosemite National Park, California
The length of twilight varies dramatically depending on the time of year and your position on earth. At the poles twilight can last as long as 2 weeks! But generally speaking, twilight usually starts shortly after the sun drops below the horizon and continues for another 40-60 minutes or so before the sky is completely dark.
During this time the sky still has plenty of rich colour but there is no longer any direct light. You might be surprised how much colour there really is in the sky during twilight since a camera’s sensor can pick up more light than we are able to see with our eyes.
The images in this post demonstrate how different the sky can look between the early stages of twilight to the end of twilight.
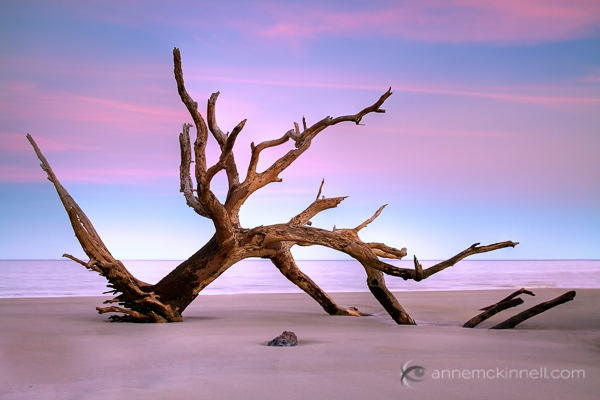
Driftwood Beach, Jekyll Island, Georgia
I prefer to shoot twilight after sunset, but of course it happens in reverse order in the morning too!
Assuming you are shooting after sunset, the first stage of twilight is when the subtle pinks begin to show in the sky. Slowly the blues will begin to appear. I love to shoot landscapes during this early stage when there is still a lot of ambient light so the land is not entirely dark.
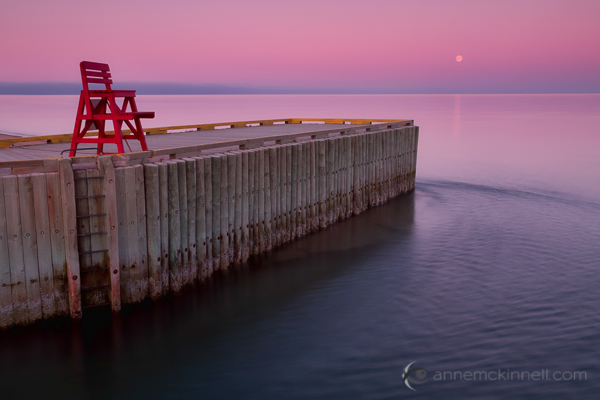
Basin Head, Prince Edward Island, Canada
During this early stage the sky is often much brighter than your subject which makes exposure difficult. It’s a great time to use high dynamic range (HDR) photography and blend multiple exposures to maintain detail in the landscape. Or, depending on the type of scene you are photographing, you can use graduated neutral density filters to even out the exposure.
Soon the sky will begin to get darker and the pinks and blues will deepen. The exposure will even out so that neither HDR nor graduated neutral density filters are needed.

Mule Ears, Bid Bend National Park, Texas
During the later stages of twilight the pinks will fade and the blues will intensify to a dark cobalt shade. This is a great time to photograph cityscapes. The combination of natural light in the sky and artificial city lights is magical.
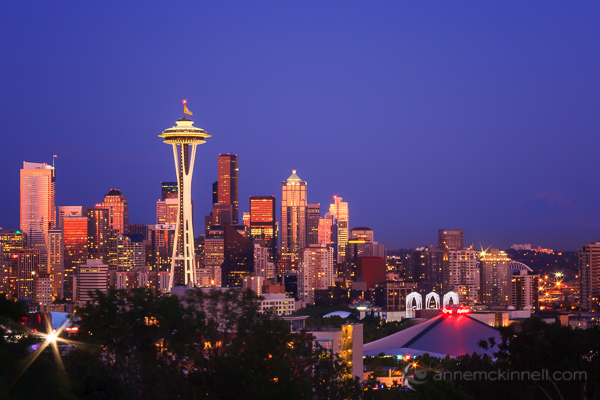
Seattle, Washington
To make the most of the limited amount of time you have to shoot during twilight, scout out your location before hand. Twilight doesn’t last long so you need to be prepared. If you can’t make a separate scouting trip at least go an hour or two early so you have plenty of time to explore before deciding what to shoot.
Find a subject with a distinct shape and take some test shots to figure out the best composition and perspective. Keep your eye out for good foreground elements and any artificial light sources that might be present later.
Tips:
- Use a low ISO to reduce the amount of noise in the image.
- Long shutter speeds will allow the camera to pick up lots of colour.
- If there are city lights in your image use a small aperture, like f/22, to turn the lights into star bursts.
- A tripod is an absolute requirement if you want a low ISO, long shutter speed, and small aperture.
- You may need a polarizing filter and/or a graduated neutral density filter for the early stages of twilight.
- Use a cable release and/or a 2 second timer so you do not introduce camera shake.
- Use your mirror lock-up feature so the movement of the mirror does not introduce camera shake.
- Your camera’s auto-focus may not work in low light conditions. If you set up ahead of time, you can use your auto-focus while there is still light in the sky and then turn auto-focus off to prevent your camera from attempting to refocus when it is is darker outside. Otherwise you will need to focus manually.
- Use your histogram to ensure you are getting a good exposure.
- Bring a flashlight so you can find your way home.
- Wear or bring bug spray so the little bugs don’t ruin your good time.
- Bring warm clothes! Don’t miss the perfect shot because you got cold and left too early.
Shooting at twilight can sometimes take a little preparation and planning but the rewards are definitely worth it.
Post originally from: Digital Photography Tips.
Check out our more Photography Tips at Photography Tips for Beginners, Portrait Photography Tips and Wedding Photography Tips.
via Digital Photography School http://digital-photography-school.com/shooting-in-the-twilight-zone?utm_source=feedburner&utm_medium=feed&utm_campaign=Feed%3A+DigitalPhotographySchool+%28Digital+Photography+School%29
Regards,
ResponEliminaThe information you provide is very important. There are many things a photographer needs to keep in mind. Histogram photography is one of them. With all these things in mind, your photography will be definitely beautiful. Your information is really help for me. Thank you very much.
transparent background Photoshop