It’s a brand new year and with that comes hope for better web standards. Just last November a new specification was published: The CSS Mask Specification. This is an official specification on something that webkit browsers could do for a long time (mask images), which means it’s going to be implemented in other browsers now too. What else will CSS bring to the table in the coming year?
CSS Masks
Masks have been around for a long time, and were initially implemented by webkit browsers as a pretty neat feature, albeit one we could never really use because it wasn’t a standard. Time passed, and now we have a real W3C specification on CSS masks, which will most likely be implemented by major browsers in the coming months.
So what exactly is a mask? To put it simply, in a mask we will have an image or element, and then a image consisting of a black or white shape with a transparent background. If we apply the mask to our image or element, the image or element will be ‘mapped’ to the mask. This means that the black or white area will be replaced by the image or element we are masking. For example:
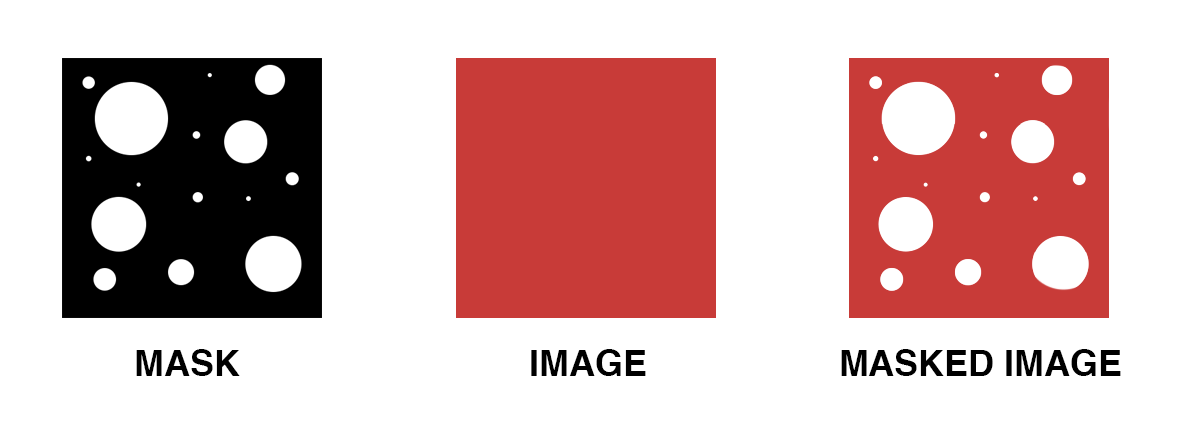
In the mask, the white circles are actually transparent
Mask Implementation
Masks can be used today, but unfortunately not to their full potential. Currently Webkit is the only browser supporting masks. Webkit currently only supports alpha masks, which means if you have a mask, it doesn’t matter what colour the shape is, the content will be clipped to it.
The other kind of mask is luminance (not supported yet). Luminance masks are black and white, where the white areas will show the image, and the black will not. Grey areas will show the image slightly depending on how white they are (effectively, the darker the grey area the lower the opacity of whatever you’re masking).
Webkit Implementation
Masks are easy to use in webkit, in fact you can just use the mask css tag:
.element {
     -webkit-mask: url('mask.png');
}
Lets try to create a working example though. Here is our mask image (We’re using alpha, so the best thing to do is a black shape on a transparent background):
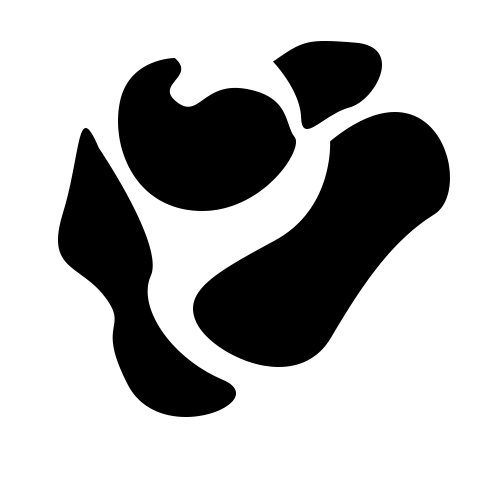
Our Mask Image
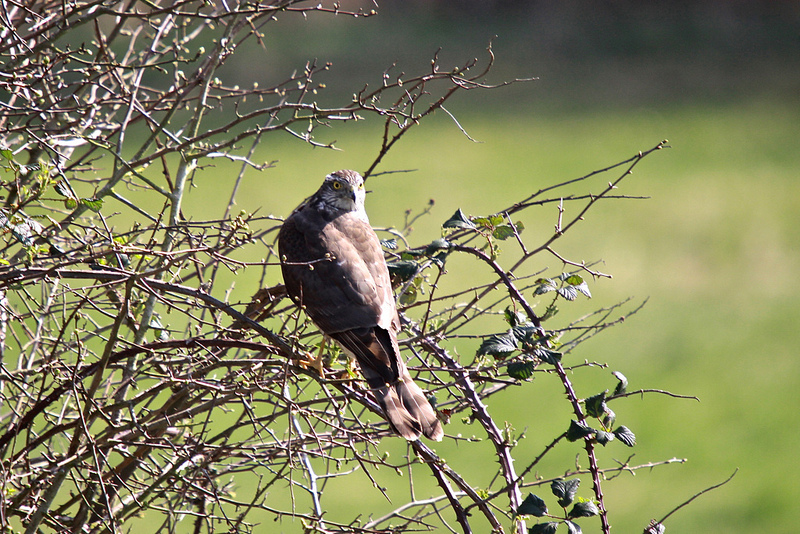
Now lets say we have an image (HTML elements work too!). For this simple example we’ll use an image. Here is the image I’m going to use:
With a little HTML and CSS:
<div class="element">
    <img src="image.jpeg" alt="" />
</div>
<style type="text/css">
.element {
   width: 500px;
   overflow: hidden;
}

.element img {
    -webkit-mask: url(mask-image.png);
}
</style>
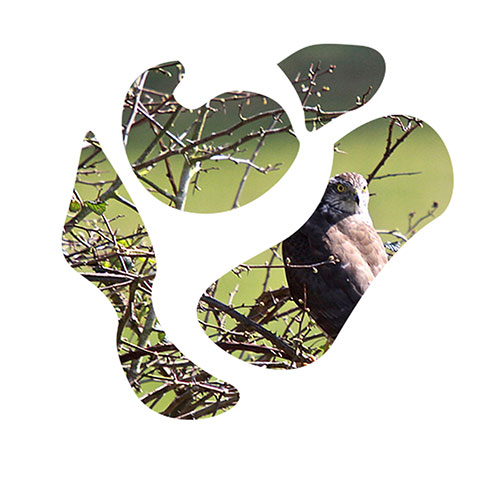
We end up with this in webkit browsers:
It’s also possible to use properties that you would expect on background tags with masks. For example, you can set the position:
.element img {
     /* Mask URL, Mask position, repeat mask?, how far should the mask mask? (content-box, padding-box or border-box?) */
    -webkit-mask: url(mask-image.png) 30% 30% repeat-x border-box;

    /* .. is the same as.. */
    -webkit-mask-image: url(mask-image.png);
    -webkit-mask-position: 30% 30%;
    -webkit-mask-repeat: repeat-x;
    -webkit-mask-box-clip: border-box;

    /* You can also set size! */
    -webkit-mask-size: 30% 30%;
}
CSS Exclusions
CSS Exclusions have very little support but they’re really going to improve how we design content for websites. Using just one simple property you can easily change the entire landscape of a document, almost as if editing it in a WYSIWYG editor. So how do CSS exclusions work? The most interesting property is wrap-flow.
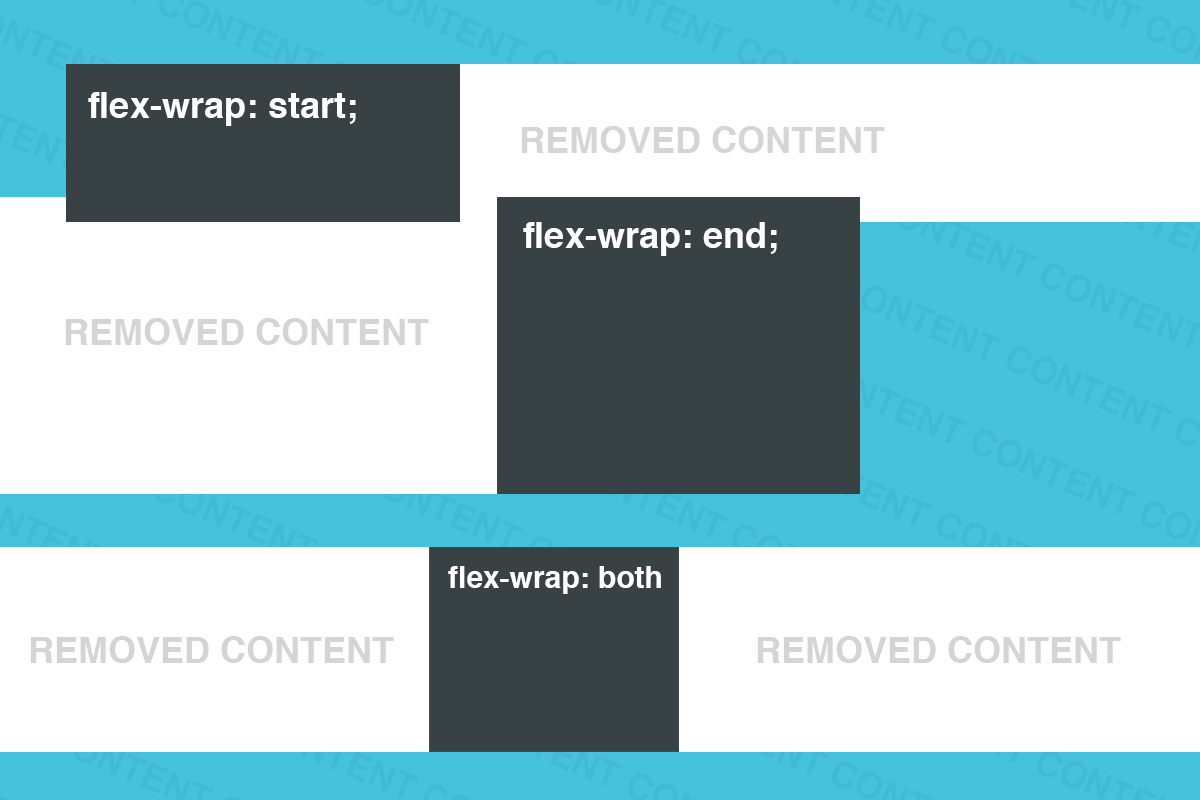
Wrap-flow
Wrap flow allows you to determine how elements will affect other elements when they are placed on top of other elements. Normally when you move an element on top of another element (via position relative, etc) the blocks will overlap. Using wrap-flow however, the other elements will be forced to adapt to fit around the element placed on top.
Wrap-flow can have quite a few settings. It can be set to auto, start, end, both, minimum, maximum or clear.
- auto: normal behaviour, none of the element is adjusted
- start: everything after the element is removed
- end: everything before the element is removed
- both: only content below the object is removed
- minimum: the side with the most content is removed
- maximum: the side with the least content is removed
- clear: all content is removed from the height of the object
That probably makes no sense to you, so here are some diagrams to help!
The content will usually be text, so the text will be wrapped around the overlapping pieces. Any movement of the overlapping pieces will change the shape of the content to fit with them.
Composition and Blending
Yeah that’s right, blending modes in CSS has become an official specification. That means you’ll be able to do things like color burn with just CSS! As you’d imagine, support is non existant due to it being a brand new specification, but it is certainly something to get excited about. The specification is still pretty new so there will be changes before it hits browsers, but effectively you will have two images, one placed over the other via absolute positioning. It might look a little like this:
<div class="blend">
   <img src="duck.gif" alt="Duck" class="duck" width="500" height="500" style="position: absolute; top: 0; left: 0" />
   <img src="penguin.gif" alt="Penguin" class="penguin" width="500" height="500" style="position: absolute; top: 0; left: 0" />
</div>
Your CSS might then look a little like this:
.blend {
     position: relative;
}
.blend .duck {
     mix-blend-mode: overlay;
}
Such a combination might look a little like this:
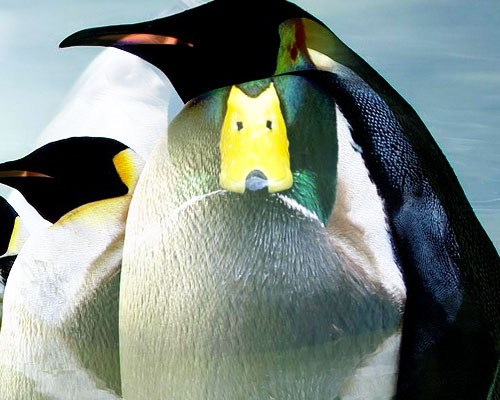
The duck looks a little ominous, but it gives you an idea of what it would look like
It is possible to try out CSS blending modes if you’re interested. First you need to download Adobe’s experimental webkit browser. Then visit this page with the experimental browser to see them all in action!
via InsertHTML http://www.inserthtml.com/2013/01/future-css3/?utm_source=feedburner&utm_medium=feed&utm_campaign=Feed%3A+inserthtml+%28InsertHTML%29
Comentaris
Publica un comentari a l'entrada