Lightroom 4 Cropping Tool in Complete Detail:

You can also adjust the size of the crop by hovering your mouse over the edge or corners of the image and clicking and dragging your mouse. This will reduce or enlarge the size of the Crop. Once you adjust the crop, to move the Crop selection, place your mouse over the image and a hand tool will appear which will enable you to move the crop selection around the image. The hand will only appear after you have sized your crop selection down.

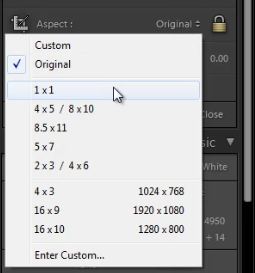
You can use one of the premade commonly used ratio’s, or enter a custom aspect ratio in the drop down menu located next to the lock icon.
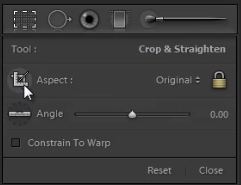
This tool will let you drag on the image and select whatever crop you would like. The ratio will be set to whatever ratio you have selected, or will be free form if Constrain Proportions is unlocked.

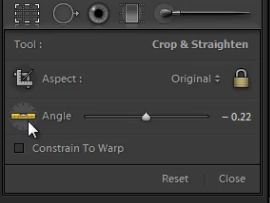 To use this tool simply select it from your Crop Tool drop down menu. Now you can click on the horizon line (or whatever line you would like your crop to be parallel to) and drag the tool along the line. The crop will then correct itself so that this line is level.
Now, doing this can this will severely decrease the detail of the image since you are cropping away such a large portion of the images initial resolution. A tip for this is to shoot in Large camera file formats where possible, especially when you know that you will have to be cropping into the image during post production. If you shoot at 22 megapixels, then cropping away 50% of the image still gives you 11 megapixels to work with.
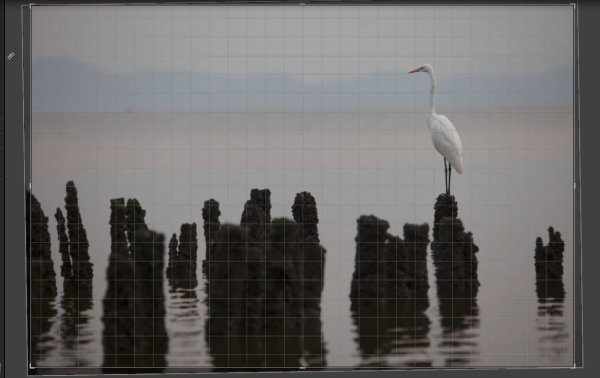
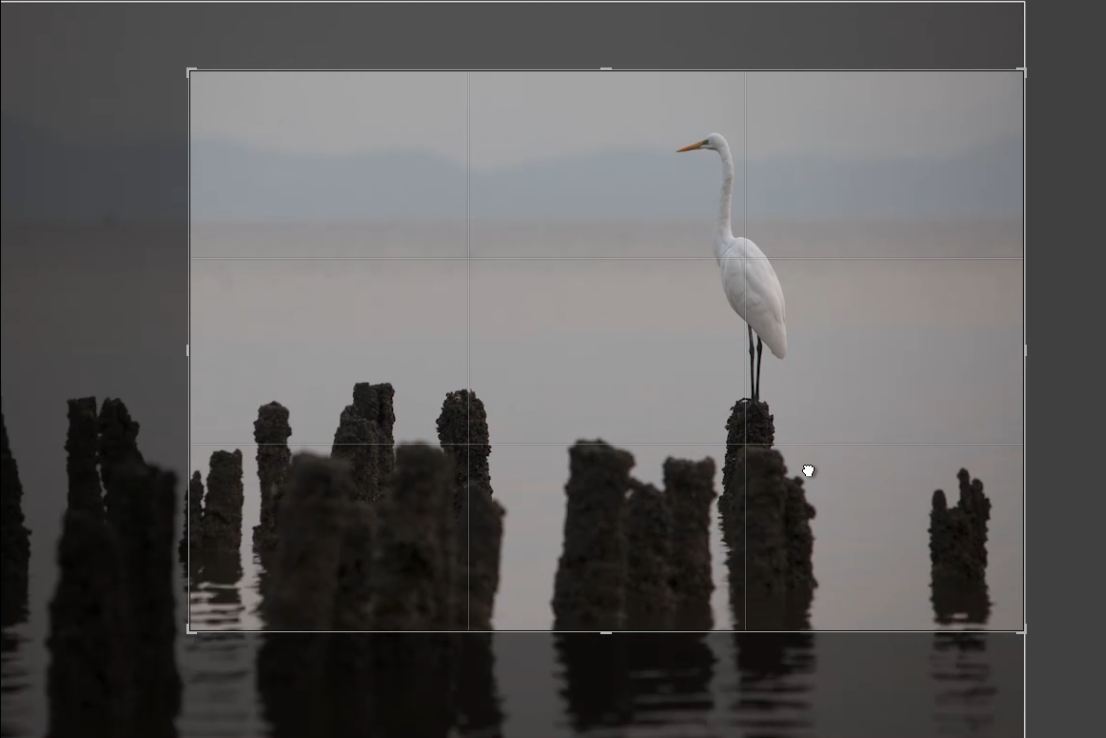
I have chosen the same image as above to alter the composition. We are going to adjust the image so that it perfectly fits the Rule of Thirds. So let’s pull up the Grid Overlay by hitting “O” and cycle through to the Rule of Thirds overlay.
As you can see from the image above, the subject does not quite fall on the one third line. What we will do to correct this is reduce the size of the crop by once again placing our mouse on the edge, or corner of the image and dragging in.
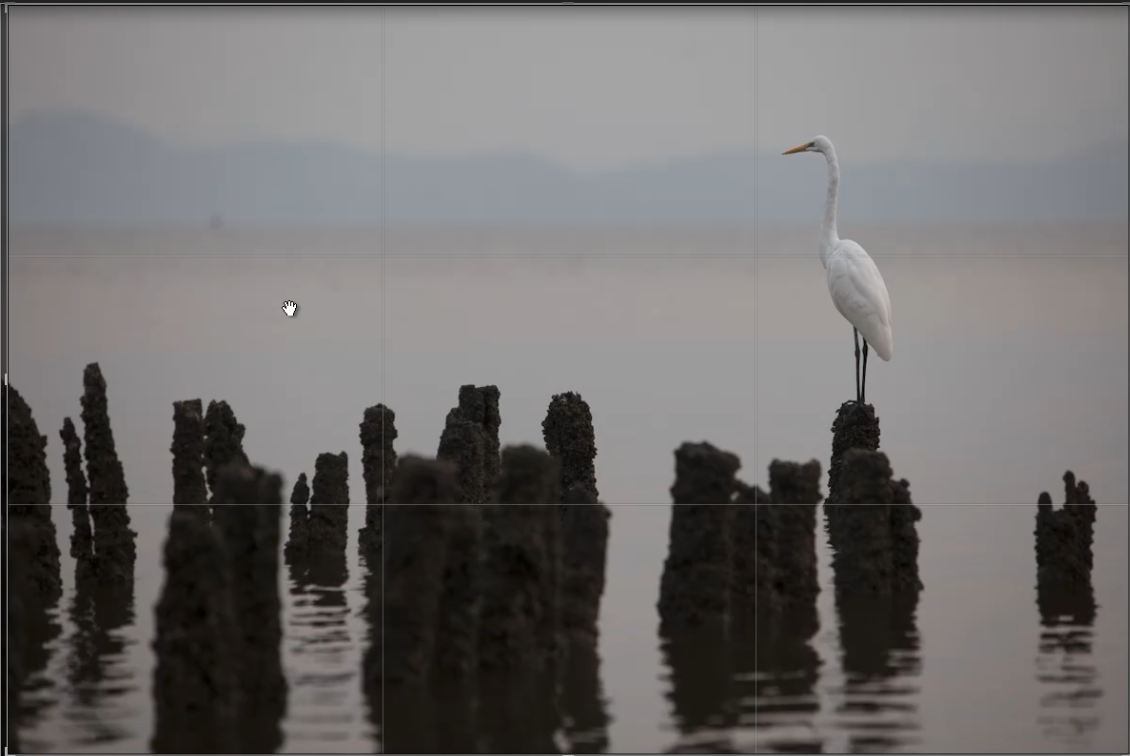
Now you can bring your mouse over the image and the hand tool will appear so that you can move around the crop selection. Once you have the crop selection where you would like, you can hit “Enter” or “R” to set it. We have now successfully cropped our image to the desired composition.


We will enhance our detail by adjusting our Sharpening and Noise Reduction in our Detail Panel. You can acess your Detail Panel by hitting “Ctrl + 5″ on a PC or ”Cmd +5″ on a Mac, or by scrolling down on your Right Panel in your Develop Module and selecting it. We will first bring up our Sharpening to +90, our Radius to 1.5, and our Detail to 30.
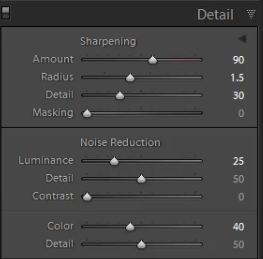
Now we want to adjust our Noise Reduction. In order to reduce the noise we will bring Luminance to +25. You do want to be careful not to reduce too much noise in your image as it will diminish detail. If taken too far, it will have an “oil painting” filter type effect.
Let’s glance at the original image information to see what ISO we shot on. If you press “I” on your keyboard you can toggle the information display.

As you can see this image was shot at 800 ISO. The higher the ISO, the more likley your image will also have Color Noise. If we zoom inn 3 to 1, you can see the Color Noise which is represented by small artifacts of varying color. Rather than the entire sky just being blue/gray, we see bits of yellow, darker blue, green, etc which is known as “color noise.”

To reduce color noise, simply bring up your Color slider in your Detail Panel. I brought Color Noise up to +40. While there is still grain/noise from luminence, the color noise has been removed as shown below.
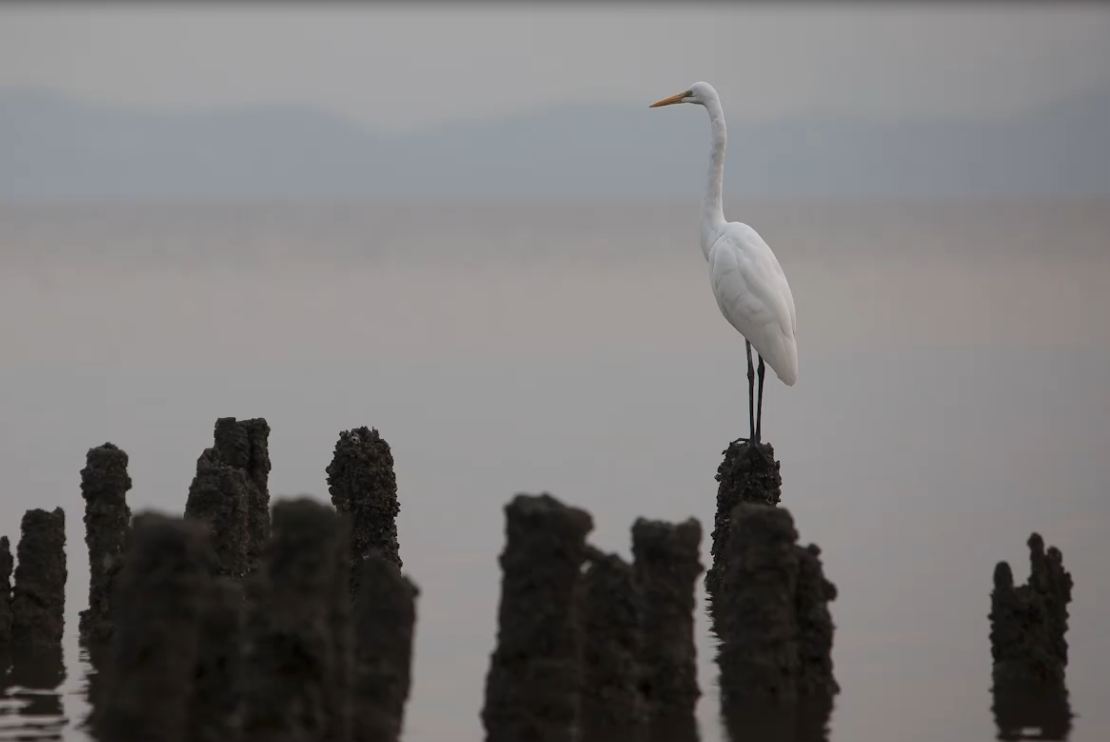
After adjusting the Detail we are finished with our crop and our image is ready be color corrected and go through basic post production. Here is our finished cropped image.
eDVD Digital Download available at SLR Lounge
Physical DVD available for purchase at Amazon Prime
Post originally from: Digital Photography Tips.
Check out our more Photography Tips at Photography Tips for Beginners, Portrait Photography Tips and Wedding Photography Tips.
Lightroom 4 Cropping Tool in Complete Detail


Introduction
This tutorial has been transcribed from the SLR Lounge Lightroom 4 Workshop on DVD, a 14 hour Lightroom 4 A – Z guide with over 130 tutorials for mastering Lightroom from start to finish. The Digital download can be purchased from SLR Lounge while the physical copy is available through Amazon Prime.Overview
In this article we will go over Lightroom’s Cropping Tool in complete detail. We will be covering manual cropping, Custom Ratio’s, the Straighten Tool, as well as the Frame Crop Tool and the Constrain to Warp option. We will also touch on Major Crops, and how to compensate to enhance detail. To get started, you can access the Crop OverlayTool by hitting “R” on your keyboard or by selecting it on the Adjustment Tool Bar.Cropping Basics
The most common way of using the Crop Tool is manual cropping. To do so, place your mouse on the outside of the image and a double sided arrow will appear. Then just click and drag in either direction untill you have corrected the crop to the proper angle. To set the crop you can hit “Enter” on your keyboard, or “R” which will set the crop and take you out of the Crop Overlay.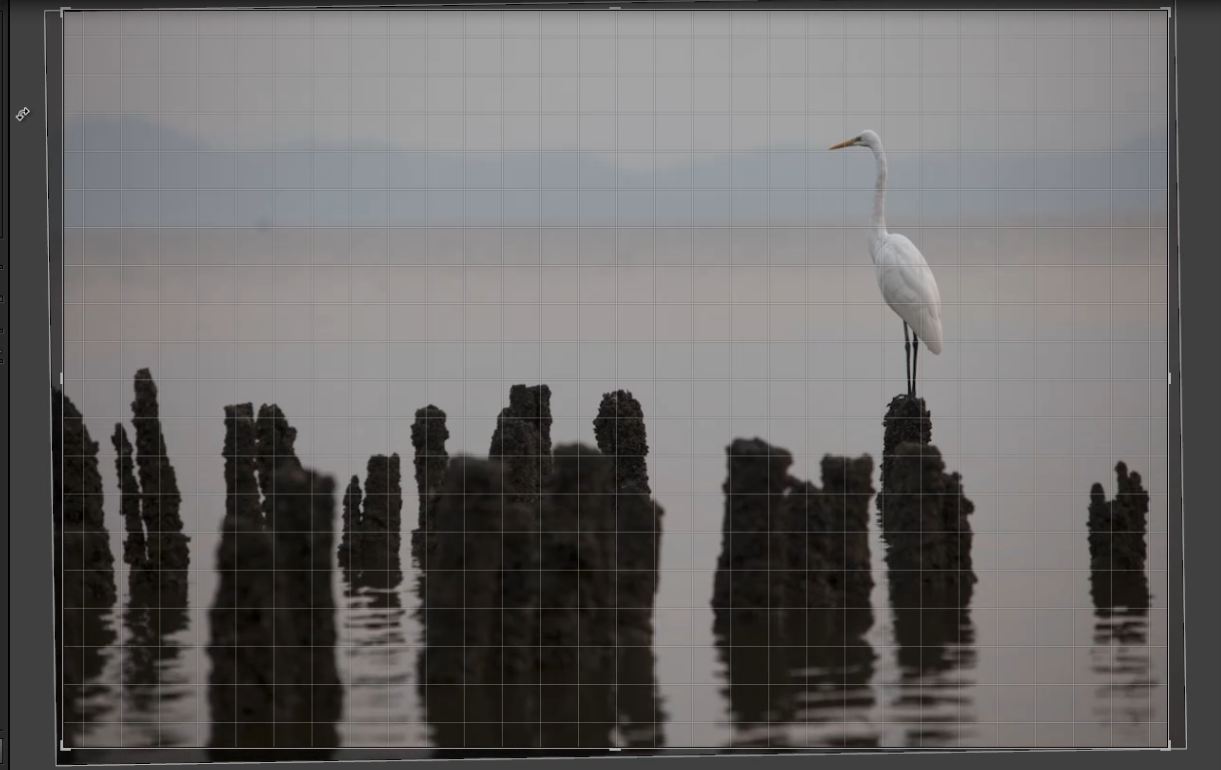
You can also adjust the size of the crop by hovering your mouse over the edge or corners of the image and clicking and dragging your mouse. This will reduce or enlarge the size of the Crop. Once you adjust the crop, to move the Crop selection, place your mouse over the image and a hand tool will appear which will enable you to move the crop selection around the image. The hand will only appear after you have sized your crop selection down.
Constrain Proportions
If your porportions are constrained then the crop will keep the original aspect ratio (4×6 unless you are shooting with a different format camera) when the size is being adjusted, if not, you will need to hold “Shift” while dragging in to constrain the proportions. You can tell if the crop ratio is constrained if the lock on the Crop Overlay Tool drop down menu is in the locked position. You can toggle this on and off by simply clicking the lock. If you unlock the Constrain Proportions then you can free transform your crop into any aspect ratio.You can use one of the premade commonly used ratio’s, or enter a custom aspect ratio in the drop down menu located next to the lock icon.
Crop Frame Tool
Yet another useful tool, and another method to crop within the Crop Overlay, is the Crop Frame Tool which you will see the cursor pointing to in the image below.This tool will let you drag on the image and select whatever crop you would like. The ratio will be set to whatever ratio you have selected, or will be free form if Constrain Proportions is unlocked.
Resetting the Crop
To reset your crop at anytime you can hit “Ctrl + Alt + R” on a PC, or “Cmd + Opt + R” on a MAC. You can also hit the Reset button in the Crop Overlay drop down menu.Cropping with the Straighten Tool
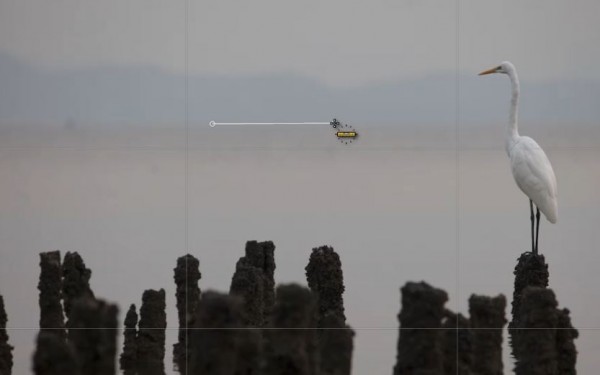
Another option with the Crop Tool is the Straightening Tool. This is very practical to use when your image has a prominante horizon line. To use this tool simply select it from your Crop Tool drop down menu. Now you can click on the horizon line (or whatever line you would like your crop to be parallel to) and drag the tool along the line. The crop will then correct itself so that this line is level.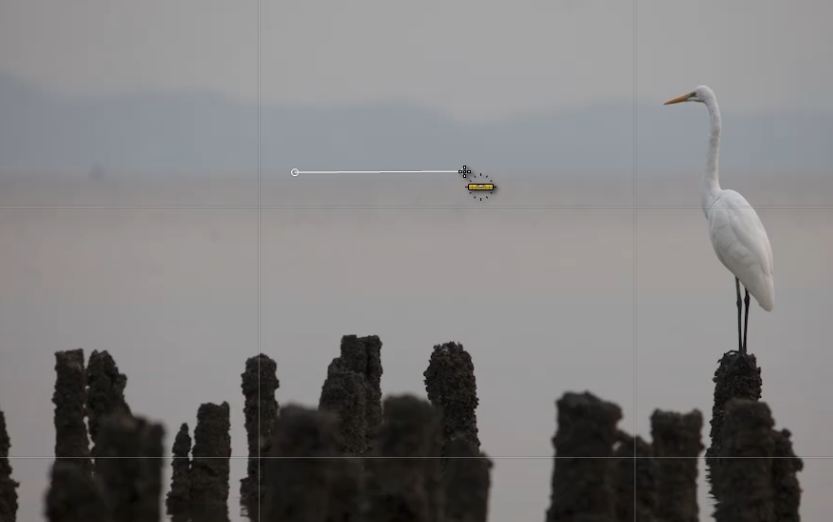
Constrain to Warp
One of the final options that you see in your Crop Overlay Tool is the Constrain to Warp at the bottom of the Crop Overlay drop down menu. This option controls whether or not the crop will constrain to the edges of the image if you use lens correction or another warping tool to adjust the image. Having this option checked will always crop the images so that no gray areas will appear on adjust that have been adjusted/warped.Cropping for Compositions Using the Grid Overlay
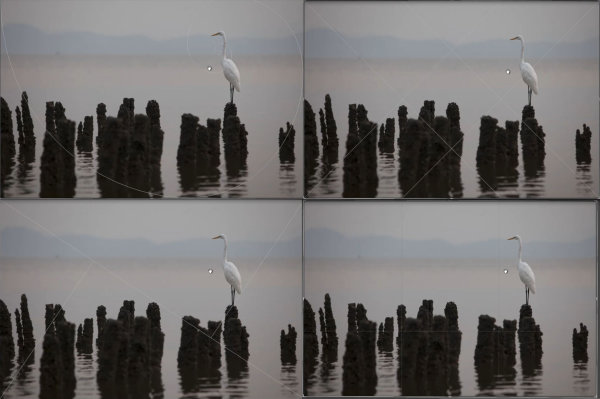
The Grid Overlay is a useful tool for checking your composition, as well as your alignment. By hitting “O” on your keyboard while the Crop Tool is selected, you can cycle through the different overlay’s lightroom offers. There are numerous overlays that portray different compositional rules such as the Rule of Thirds. I usually keep our’s on the Rule of Thirds Grid Overlay in order to correct to simultaneously correct compositions as well as horizon lines.“Major Cropping”
We use the term “Major Cropping” when you are not cropping to make small adjustments, but rather to completely change the composition.Now, doing this can this will severely decrease the detail of the image since you are cropping away such a large portion of the images initial resolution. A tip for this is to shoot in Large camera file formats where possible, especially when you know that you will have to be cropping into the image during post production. If you shoot at 22 megapixels, then cropping away 50% of the image still gives you 11 megapixels to work with.
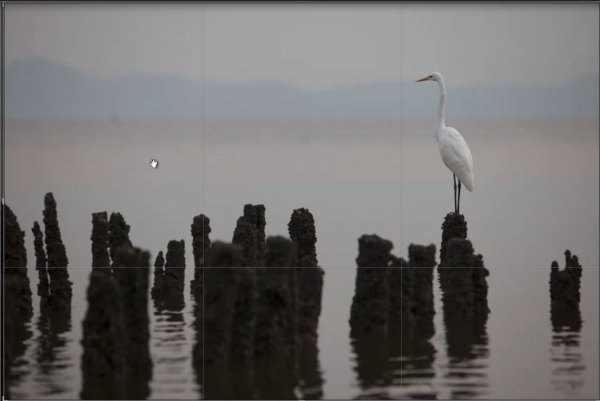
I have chosen the same image as above to alter the composition. We are going to adjust the image so that it perfectly fits the Rule of Thirds. So let’s pull up the Grid Overlay by hitting “O” and cycle through to the Rule of Thirds overlay.
As you can see from the image above, the subject does not quite fall on the one third line. What we will do to correct this is reduce the size of the crop by once again placing our mouse on the edge, or corner of the image and dragging in.
Now you can bring your mouse over the image and the hand tool will appear so that you can move around the crop selection. Once you have the crop selection where you would like, you can hit “Enter” or “R” to set it. We have now successfully cropped our image to the desired composition.
Enhancing Details After Major Cropping
Since we have cropped about twenty percent of our image out, we have lost quite a bit of image detail. To adjust for this we will enhance our detail. Let’s start by zooming into the image one to one. You can do this by selecting the 1:1 icon in the Navigator Panel on the upper left hand side of your Develop Module.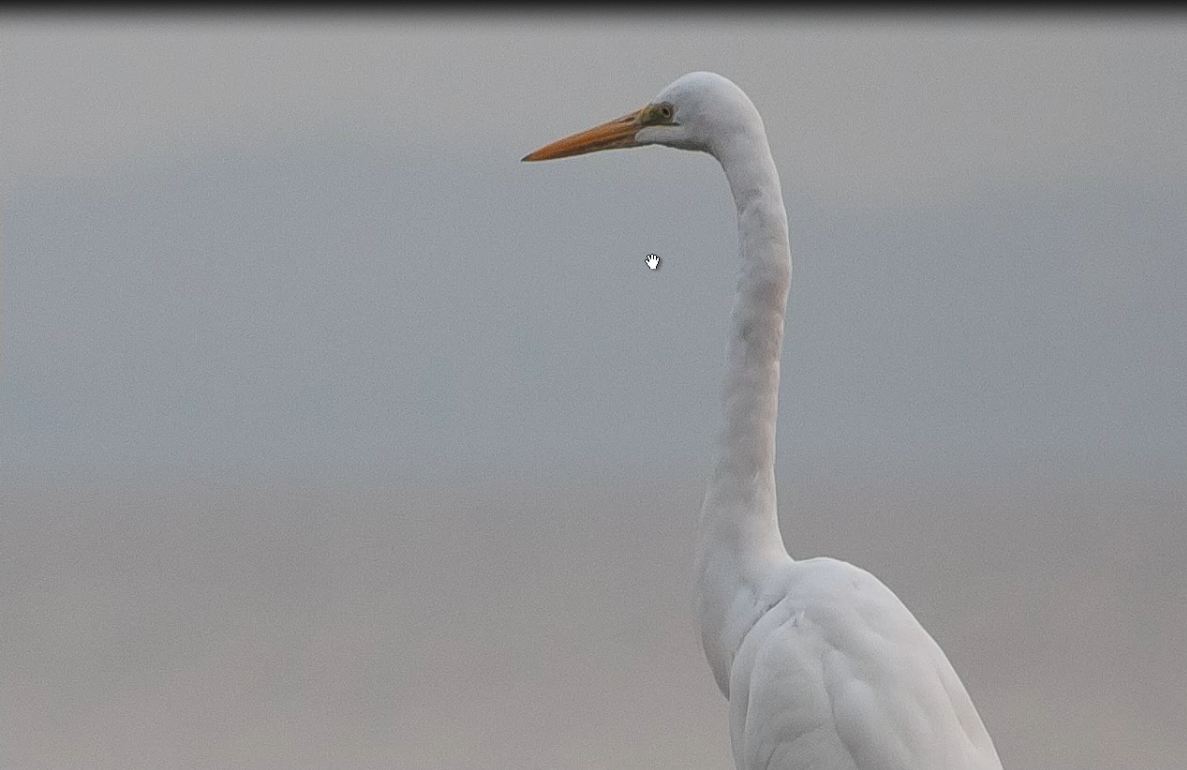
We will enhance our detail by adjusting our Sharpening and Noise Reduction in our Detail Panel. You can acess your Detail Panel by hitting “Ctrl + 5″ on a PC or ”Cmd +5″ on a Mac, or by scrolling down on your Right Panel in your Develop Module and selecting it. We will first bring up our Sharpening to +90, our Radius to 1.5, and our Detail to 30.
Now we want to adjust our Noise Reduction. In order to reduce the noise we will bring Luminance to +25. You do want to be careful not to reduce too much noise in your image as it will diminish detail. If taken too far, it will have an “oil painting” filter type effect.
Let’s glance at the original image information to see what ISO we shot on. If you press “I” on your keyboard you can toggle the information display.

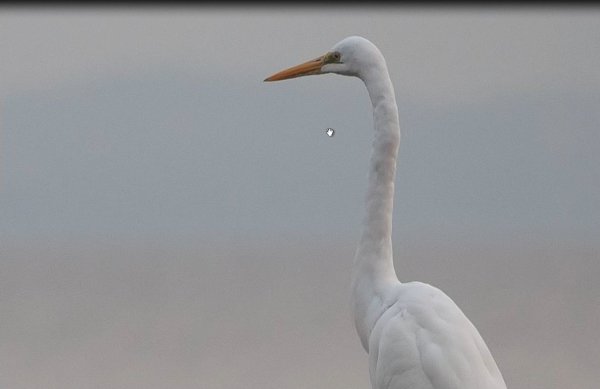
As you can see this image was shot at 800 ISO. The higher the ISO, the more likley your image will also have Color Noise. If we zoom inn 3 to 1, you can see the Color Noise which is represented by small artifacts of varying color. Rather than the entire sky just being blue/gray, we see bits of yellow, darker blue, green, etc which is known as “color noise.”

To reduce color noise, simply bring up your Color slider in your Detail Panel. I brought Color Noise up to +40. While there is still grain/noise from luminence, the color noise has been removed as shown below.

After adjusting the Detail we are finished with our crop and our image is ready be color corrected and go through basic post production. Here is our finished cropped image.
The SLR Lounge Lightroom 4 DVD Guide
Stay tuned for Part 3 of the Advanced Portrait Retouch Series where we will go over how to enhance and brighten a subjects eyes, as well as enhance detail and contrast in hair and other parts of the image! If you enjoyed this tutorial then we know you will love the SLR Lounge Lightroom 4 Workshop on DVD featuring 130 tutorials and nearly 14 hours of training covering Lightroom 4 from A – Z, nearly half of which is devoted strictly to image processing techniques.eDVD Digital Download available at SLR Lounge
Physical DVD available for purchase at Amazon Prime
Post originally from: Digital Photography Tips.
Check out our more Photography Tips at Photography Tips for Beginners, Portrait Photography Tips and Wedding Photography Tips.
Lightroom 4 Cropping Tool in Complete Detail
I think the theory you shared is really logical and important. Undoubtedly, it is helpful for our. Thank you for your big sharing. May you live long.
ResponEliminahttps://clippingexpertasia.com/best-camera-for-product- photography/