Reverse Lens Macro: Close Up Photography Lesson #3:
This is the third in a series of four lessons on close-up and macro photography by Andrew S Gibson, author of Up Close: A Guide to Macro & Close Up Photography.
In my previous articles I looked at two easy techniques for getting closer to your subject – using close-up lenses and extension tubes (you can catch up on them here and here).
In this lesson I’m going to take a look at a technique you can use to get even closer – reverse lens macro.
If you already own a 50mm prime or standard kit lens (around 18-55mm focal length range) then reverse lens macro is also the least expensive way there is to get up close.
The reverse lens technique involves turning the lens around so that the rear element points outwards, and the front element faces the camera body. You can buy special adapters to attach the reversed lens to either your camera body or another lens.

If you haven’t seen this in action before, it may seem like bit of a strange thing to do. But it works. The above diagram shows why. In normal use, a 50mm lens focuses light from far away so that the image is much smaller and can be recorded by a digital sensor or on film.
Reverse the lens and the opposite occurs. The 50mm lens magnifies what it sees, giving near life-size reproduction.
There are two ways you can use the reverse lens technique:
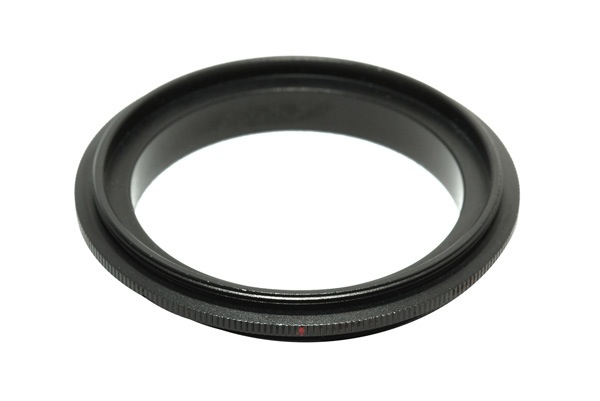
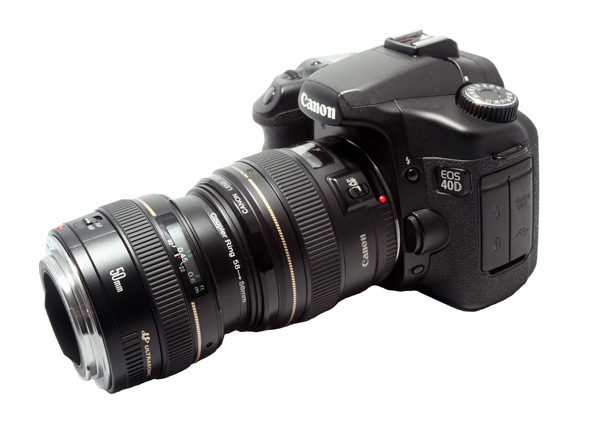
Use a reversing ring (illustrated above) to attach your reversed lens to your camera. You can buy these adapters inexpensively from Amazon or eBay. One side screws into the end of your lens like a filter, the other attaches to your camera’s lens mount.
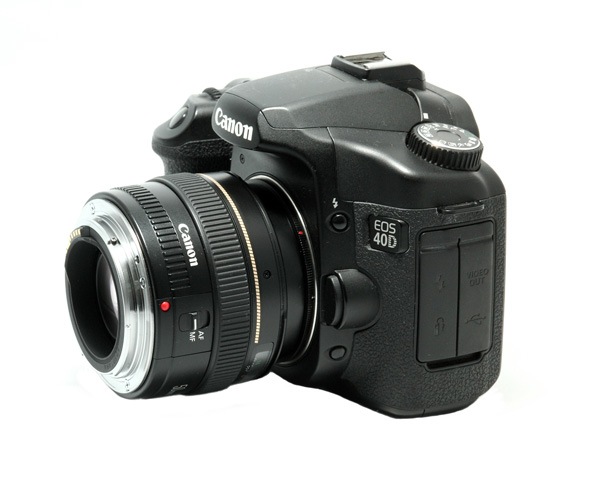
The photo above shows how it works.
This technique works well if you have a lens with a manual aperture ring. Depth-of-field decreases as you get closer to your subject, and at the high magnifications obtained by reversing a 50mm lens, you need to stop down to increase the zone of sharpness.
If your reversed lens doesn’t have a manual aperture ring, you can’t stop down and are forced to work at the maximum aperture of your lens. However, don’t let this stop you trying out this technique – take a look at the work of Roni, who uses a reversed 50mm lens at its widest aperture, to take some beautiful photos.
2. Twin lens reverse macro< ?h3>
Post originally from: Digital Photography Tips.
Check out our more Photography Tips at Photography Tips for Beginners, Portrait Photography Tips and Wedding Photography Tips.
Reverse Lens Macro: Close Up Photography Lesson #3


This is the third in a series of four lessons on close-up and macro photography by Andrew S Gibson, author of Up Close: A Guide to Macro & Close Up Photography.
In my previous articles I looked at two easy techniques for getting closer to your subject – using close-up lenses and extension tubes (you can catch up on them here and here).
In this lesson I’m going to take a look at a technique you can use to get even closer – reverse lens macro.
If you already own a 50mm prime or standard kit lens (around 18-55mm focal length range) then reverse lens macro is also the least expensive way there is to get up close.
The reverse lens technique involves turning the lens around so that the rear element points outwards, and the front element faces the camera body. You can buy special adapters to attach the reversed lens to either your camera body or another lens.
If you haven’t seen this in action before, it may seem like bit of a strange thing to do. But it works. The above diagram shows why. In normal use, a 50mm lens focuses light from far away so that the image is much smaller and can be recorded by a digital sensor or on film.
Reverse the lens and the opposite occurs. The 50mm lens magnifies what it sees, giving near life-size reproduction.
There are two ways you can use the reverse lens technique:
1. Single lens reverse macro
Use a reversing ring (illustrated above) to attach your reversed lens to your camera. You can buy these adapters inexpensively from Amazon or eBay. One side screws into the end of your lens like a filter, the other attaches to your camera’s lens mount.
The photo above shows how it works.
This technique works well if you have a lens with a manual aperture ring. Depth-of-field decreases as you get closer to your subject, and at the high magnifications obtained by reversing a 50mm lens, you need to stop down to increase the zone of sharpness.
If your reversed lens doesn’t have a manual aperture ring, you can’t stop down and are forced to work at the maximum aperture of your lens. However, don’t let this stop you trying out this technique – take a look at the work of Roni, who uses a reversed 50mm lens at its widest aperture, to take some beautiful photos.
2. Twin lens reverse macro< ?h3>
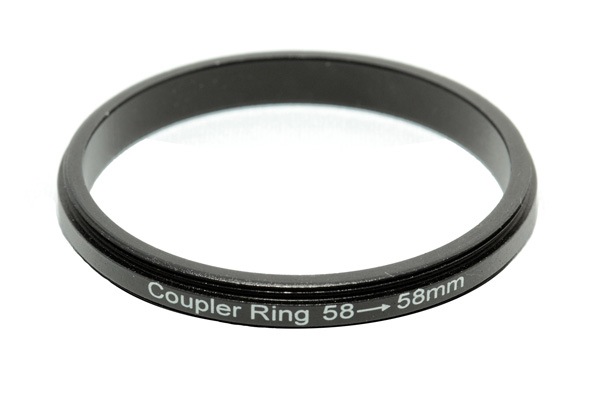
Use a coupling ring (shown above) to attach your reversed lens to another lens. The reversed lens acts like a powerful close-up filter (I covered close-up filters in more depth here).
A reversed 50mm lens has a strength of +20 diopters. A reversed 24mm lens has a strength of +41.6 diopter. Considering the most powerful close-up lens I know of has a strength of +10 diopter, you can see how powerful this technique is.
The above photo shows how I use this technique. I attach a reversed 50mm lens to my 85mm prime lens. In this set-up, the 85mm lens is called the primary lens and the reversed lens the secondary lens.
You can try this with any lens as the primary lens. The longer the focal length, the more magnification you’ll achieve. The important thing is that the filter thread sizes match, or are close to each other, so you buy a coupling ring that will join them together. You have the option of using a coupling ring combined with a stepping ring if you need to.
The advantage of twin lens reverse macro is that you can leave the reversed lens open at its widest aperture. You stop down the primary lens instead to increase depth-of-field.
Depending on the lens that you attach the reversed lens to, you can achieve up to 3x life-size reproduction. That’s three times as close as most macro lenses.
Caring for the reversed lens
The reversed lens technique does leave the rear element of your reversed lens open to the elements. You should always take care with the reversed lens to avoid scratching the exposed element.
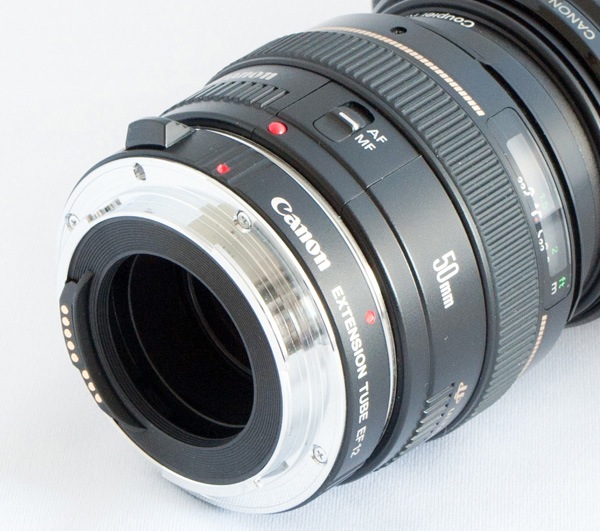
If you have an extension tube, you can attach it to the reversed lens (see photo above). This helps protect the rear element and also acts as a lens hood.
Image sharpness
The reversed lens technique gets you so close to the subject that it’s virtually impossible to hand-hold the camera. For best results, use a tripod to keep the camera steady, and a cable release to fire the shutter.
I find it best to use this set-up indoors, especially for delicate subjects like flowers. If you try it outside, the slightest breeze will move the flower and spoil the photo.
For best results (in terms of image sharpness) stop down the primary lens to at least f4. This increases the depth-of-field and also avoids softening of the image that can happen when you use the twin lens reverse macro technique with the primary lens at it’s widest aperture settings.
Lighting

You can use natural light to illuminate your subject, as long as you don’t mind using a tripod and long shutter speeds to obtain the required exposure.
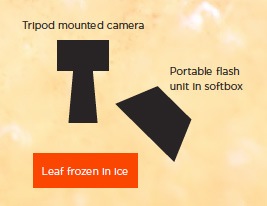
You can also use flash. You don’t need a specialised macro flash – I use a Canon Speedlite with a small softbox. That’s all I used to take the above photo. The diagram shows the set-up.
Kit lenses
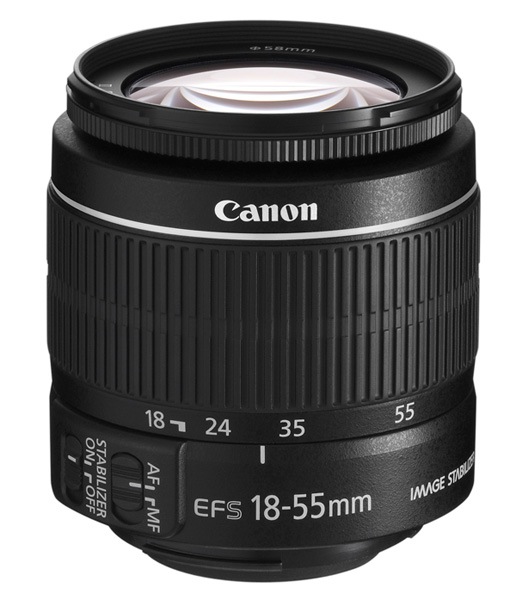
I’ve used a 50mm prime lens to illustrate this article, but don’t forget you can try this out with just about any lens, although 50mm seems to be the ideal focal length. Kit lenses like the Canon EF-S 18-55mm f3.5-5.6 IS II pictured above work great.
You can learn more about close-up and macro photography in my new ebook Up Close: A Guide to Macro & Close Up Photography, available now from Craft & Vision for just $5.
Post originally from: Digital Photography Tips.
Check out our more Photography Tips at Photography Tips for Beginners, Portrait Photography Tips and Wedding Photography Tips.
Reverse Lens Macro: Close Up Photography Lesson #3
There is no comparison to your photography. In a word, it's great. Also, your sharing information is awesome and effective. Thank you very much sharing for your most valuable tips.
ResponEliminaClipping Path Asia
how to remove clothing wrinkles in photoshop