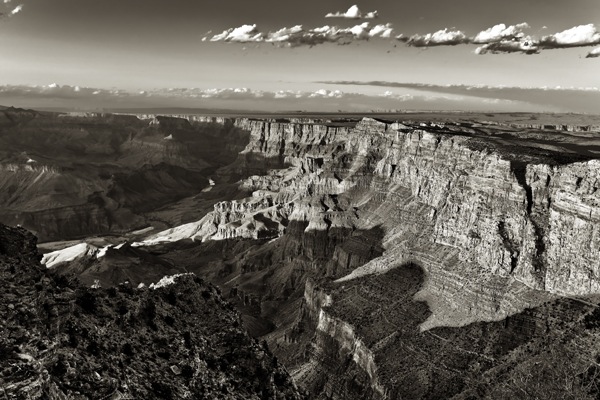
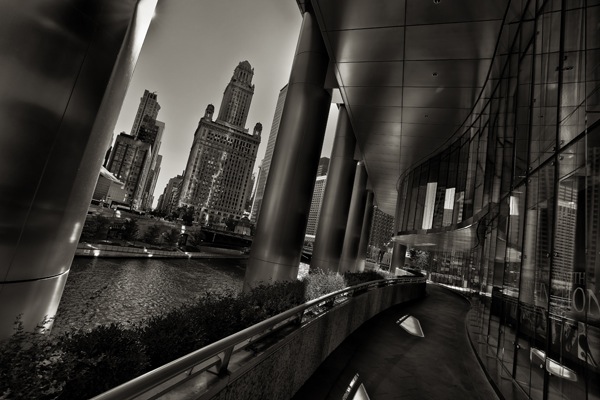
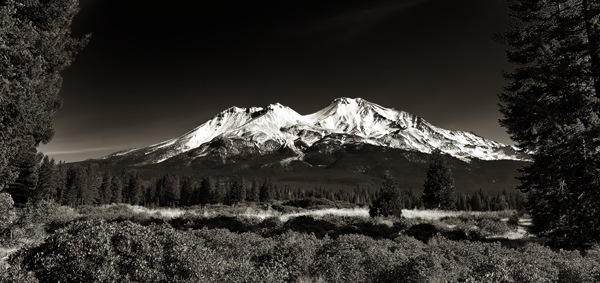
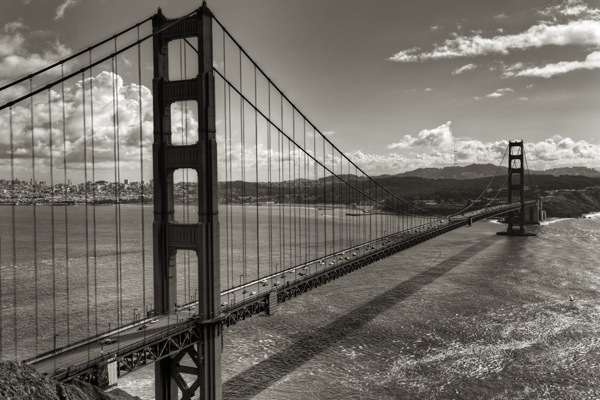
A few months ago, DPS published an article I wrote entitled “How to See in Black and White.” That article had a small bonus section at the end, in which I talked about how useful HDR can be to the monochrome photographer – a fact that is initially somewhat counterintuitive, since HDR is stereotypically held to be all about garish, over-done colors and excessive haloing.
In fact, as I talked about in that previous article, HDR can be extremely useful in bringing out microtexture, enhancing the effect of light and shadow, and in creatively influencing the overall tone of the image. All of these things lend themselves immediately and powerfully to black and white photographs, making HDR another viable tool in the monochrome photographer’s arsenal.
That section of the article received many comments and questions. In particular, a lot of photographers were wondering about the “right” way to make a black and white HDR, given that there are, in fact, numerous possible paths you can take through the editing process to achieve the end result. With this article I will show you how I do it – my ‘recommended’ way – and also address a few alternative methods. I encourage you to experiment and discover which method works best for you, artistically, creatively, and economically.
My ‘Recommended’ Way to Create a Black and White HDR Image
I want to emphasize again, before we begin, that this is the workflow I currently use and recommend to others, but it isn’t necessarily the right way, or even the way some experts (including those who develop the HDR products I’ll talk about) recommend.
For this article I’ll be using Oloneo’s new and impressive PhotoEngine v1.0 for all of my HDR rendering. Every example photo in this article was tonemapped using Oloneo PhotoEngine v1.0. However, the same basic workflow steps apply regardless of which HDR software package you are using, be it HDRSoft’s Photomatix, Nik’s HDR Efex Pro, Photoshop’s own Merge to HDR Pro, or any of the many others.
First of all, I always shoot RAW. This allows me greater latitude and control of adjustments in post, and, when shooting bracketed shots for HDR, if there was too much movement in the frame I can use a single RAW shot to create a pseudo-HDR (by saving three different JPEGs from the same RAW, each with different exposure values – see the addendum at the end of this article for more).
When I have my three RAW files, taken via bracketed exposure (usually +/- 2 or 3 EV), I run each RAW through Photoshop’s Camera RAW, using a preset so each exposure receives identical treatment. I boost the clarity, contrast, sharpness (masked), and reduce noise, but I don’t alter the color, white balance, or exposure at this point. I then save off JPEGs from each RAW, usually just calling them 1, 2, and 3.
I then pull these three JPEGs into Oloneo PhotoEngine, and start the tonemapping process. With Oloneo, as with Photomatix and the others, I can create presets that are roughly setup according to my general preference (I like a more natural look to my HDR images, rather than overdone or excessively haloed). Oloneo allows for rapid tweaking with immediate feedback at a very detailed level, and I will often tweak whichever preset I chose to get the right look and feel.
At this point, if I know for sure I want to eventually end up with a black and white shot, I will tweak the tonemapping to enhance the textures, lighting, and depth of shadow. Essentially, I’m aiming for a color version that will work well in black and white. This will take practice and experimentation to get used to, but you can refer to my previous article on “How to See in Black and White” for more on this concept.
Once the image is tonemapped, I save it as a new JPEG. Some people prefer TIFF, for lossless quality, but after many back-to-back trials I personally can’t see any difference between a 100% quality JPEG and a TIFF file, and the JPEGs are much smaller files to work with. I then pull that JPEG into Photoshop.
In Photoshop I reduce the noise further, as necessary – most tonemapping introduces noise, because you are combining three images and noise is additive. I personally use Topaz’s noise reduction plugin for this, but any method you like should work. I generally then need to boost the contrast a little, and may need to use Content Aware to remove any dust specks that might not have shown up on one shot, but do now after the image has been tonemapped.
At this point I save the color JPEG. Then I create a duplicate layer and fire up Nik’s Silver Efex Pro 2. This plugin is my favorite method of converting a color image into black and white – it simply provides an enormous range of options and precise levels of control, and really lets you achieve, artistically, what you have set out to achieve. That being said, you can use the Black and White adjustment layer in Photoshop, or Topaz’s black and white plugin, or just about any other color to black and white conversion method you prefer.
After playing with the image in Silver Efex Pro 2 (I generally select the “high structure, smooth” preset and then tweak it to my liking), I have my black and white image. I recommend at this point you try one more thing: since you have the black and white image on a duplicate layer, try reducing the opacity of that layer to 70% or so part of the color background layer shows through. This gives you a “desaturated” look that can be incredibly powerful for some shots, so much so that you may actually prefer it to the black and white you were going after.
If you like the black and white, set the layer opacity to 100%, merge down, and save and voila! you now have your black and white HDR image. This workflow required several different software packages and a fair amount of patience. The steps, broken down, are:
- Import each RAW into Camera RAW and use a preset on each, then save as separate JPEGs
- Pull each JPEG into your HDR rendering software, tonemap, then save as a new JPEG
- Pull the new JPEG into Photoshop, denoise and clean up, save the color JPEG
- Create an adjustment layer
- Run your favorite color to black and white conversion method
- Save off the black and white JPEG
These steps require the use of Photoshop (or GIMP, or their equivalent), an HDR tonemapping package, and, if you follow what I do, software for denoising the image and more software for changing the image to black and white. Basically:
- Photoshop (for Camera RAW and RAW processing, and cleanup of the HDR image)
- Oloneo PhotoEngine (for tonemapping and creating the HDR image)
- Topaz DeNoise (for noise removal)
- Nik Silver Efex Pro 2 (for black and white conversion)
There are simpler (and less expensive) ways.
Alternative Methods for Creating a Black and White HDR Image
Most HDR software packages, including Onoleo’s PhotoEngine, accept RAW files for processing bracketed shots and most have presets built in that will create black and white images for you right off the bat – no importing into Photoshop or another external black and white conversion plugin needed.
The steps are, obviously, much simpler:
- <
- Import each RAW into your HDR software
- Use a black and white preset
- Tweak as necessary
Onoleo in particular makes this very easy, with a couple preset black and white options to choose from and then tweak. And the results are not bad at all. I personally prefer the sharper, clearer look and greater flexibility I get using my ‘recommended’ workflow, and the central drawback of this simpler workflow is you do not get a separate color version to play with (without processing again with a different preset, of course), nor can you easily create that interesting desaturated look I described above.
However, this method is much faster, which can be very important when you are processing a large number of shots on a tight schedule. It is also cheaper, since you could get away with only one piece of purchased software (your HDR rendering package). And if you wanted to do simple clean up or global edits, you could forego Photoshop or Lightroom in favor of open-source (and free) GIMP.
Another alternative workflow is a tweak on my ‘recommended’ workflow. In this version, you skip processing the RAW files in Camera RAW; the remaining steps are the same. So:
- Import each RAW into your HDR software
- Tonemap (in color) as you prefer and save as JPEG
- Pull the new JPEG into Photoshop, denoise and clean up, save the color JPEG
- Create an adjustment layer
- Run your favorite color to black and white conversion method
- Save off a black and white JPEG
This method saves time by not making you run through Camera RAW, and still lets you save off a separate color and/or desaturated version of the shot. It is also the method some of the developers of HDR software recommend using, since the RAW files contain the most information for the HDR rendering software to use. I have found, however, that Camera RAW (and other RAW processing software packages) have some of the best sharpening and denoising algorithms available, and as such I like using them from the start to get those clear, sharp results.
There is yet another workflow possible. In this one, you convert to black and white before you bring the images into your HDR software. This is doable but I don’t recommend it, because you are throwing away too much useful data too early in the workflow process. It’s my contention that you’re better off working in color, getting the most out of that color, and only converting to black and white at the end. But your mileage may vary.
The steps here would be:
- Import each RAW into Camera RAW and use a preset on each, then save as JPEG
- Convert each JPEG into a black and white using your preferred method of conversion – just make sure to use a preset and apply the same settings to each exposure
- Pull each JPEG into your HDR rendering software, tonemap, then save as a new JPEG
- Pull the new JPEG into Photoshop, denoise and clean up, save the black and white JPEG
Clearly, the big drawback here as well is you have no option to save a color tonemapped version of the image. For me that’s a deal breaker, but it’s worth trying this workflow to at least see if you end up preferring the end result.
Whatever method you end up choosing, the most important single factor is your happiness, creatively and artistically, with the fruits of all your labor. Experiment, try each way with the same set of bracketed shots, and figure out what you are most comfortable with. There are still other workflows possible, so try things out and have fun, and make it your own.
Addendum: Creating a Black and White HDR from a Single RAW File
An advantage of shooting in RAW is that you can, in post, manually alter the exposure value of the shot. This means you can save off three different JPEGs from the same shot that have different exposures, and then combine those in an HDR rendering package to tonemap and turn into an HDR shot.
Some people do not consider this “real” HDR, since you aren’t using truly different exposures; however, even if it’s just “fake” HDR, it can be extremely useful when you have a shot with a lot of movement in the frame and yet the lighting/shadows/etc would benefit from HDR. An example might be a dramatically lit crowd scene, where people are chanting and moving and therefore bracketed shots would be impossible to align. And, even when there isn’t movement to worry about, the end results of this “fake” HDR technique are often indistinguishable from a “real” HDR shot – I’ve tested this myself a couple times.
The steps would be as follows:
- Import the RAW file into Camera RAW and use your preset; save as JPEG 1
- Import the RAW file again, set the exposure to -2.00; save as JPEG 2
- Import the RAW file a third time, set the exposure to +2.00; save as JPEG 3
- Pull each JPEG into your HDR rendering software; manually set the correct exposure values if the software asks for them (because the JPEG data for each image will show the same exposure)
- Tonemap, then save as a new JPEG
- Pull the new JPEG into Photoshop, denoise and clean up, save the color JPEG
- Create an adjustment layer
- Run your favorite color to black and white conversion method
- Save off a black and white JPEG
Check out more of Joseph Eckert’s work his website.
Post originally from: Digital Photography Tips.
Check out our more Photography Tips at Photography Tips for Beginners, Portrait Photography Tips and Wedding Photography Tips.
HDR for Black and White: A Step By Step Guide
I like black and white photography. So, I like your black and white photography. Also, your sharing guide is just wow. Thank you very much for your sharing.
ResponEliminabackground removal service