At a recent workshop I joined, several of the attending photographers expressed frustration with the slowness of Lightroom, and were surprised to see how quickly I am able to process my photos in Lightroom. So I thought I’d share some of the workflow tricks that I’ve picked up over the last few years that have helped me get faster in Lightroom.
In addition to specific workflow practices, there are also some important configuration changes you can make to optimize Lightroom performance. However, in this post I will focus on workflow technique, not application configuration. Check out this post for more information on configuring Lightroom for optimal performance.
Note: The tips and screenshots in this article are from Lightroom 4.2, but most of these ideas are also applicable to older versions of Lightroom.
Let’s get on to the tips.
1. Start with Spot Removal, and use the 2003 process
As you begin to stack up edits in Lightroom, some of the tools get slower and slower. This is the nature of nondestructive editing. None of your edits have changed the underlying image data, so the more you do with an image, the more work your computer has to do to update the preview of your image in real time as you move sliders or work with other controls.
I’ve found this phenomenon to be the most annoying when using the Spot Removal tool to retouch portions of an image. Using the Spot Removal tool at the end of your workflow can be painfully slow. To address this, I’ve formed the habit of always doing spot removal first, before applying any other edits to an image. This is much faster, and there is also a creative advantage to removing the small distractions, before you go on to more serious editing work.
To further improve the performance of the Spot Removal tool, you can change to the “2003 Process.” This is especially helpful if you have an older computer. The process version is the algorithm that Lightroom uses to decode your Raw image file and display it in the Develop Module. Different process versions give you different options in the Development Module, with significant improvements in the later versions. The 2003 Process is the most basic, and therefore the fastest. The 2012 Process gives you much more flexibility, but is more resource intensive and forces your computer to work harder.
Check out this post for more information on process versions.
The process version setting is in the Camera Calibration section of the Develop Module:
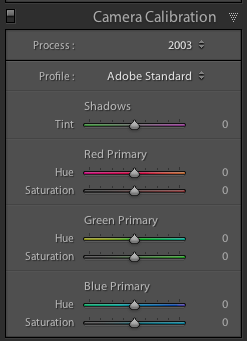
In my own workflow, especially for portrait retouching were I use the Spot Removal tool extensively, I start by changing to the 2003 process, doing only spot removal, and then changing back to the 2012 process for the rest of my edits.
CAUTION: since the process versions are very different, some controls get zeroed out when you move between process versions. Avoid making adjustments like contrast, tone curve, noise reduction, sharpening, etc while you’re in the 2003 process as you might lose some of those settings when you return to the 2012 process. Just do your spot removal in the 2003 process, and then go back to 2012 process for the rest of your editing work. Doing this at the very beginning of your workflow saves time and makes for a happier, snappier, spot removal experience.
2. Learn (and use) keyboard shortcuts
There’s a lot going on in the Lightroom interface. Using just your mouse or trackpad to get from place to place can really slow you down. Use keyboard shortcuts to jump straight to the tool you need.
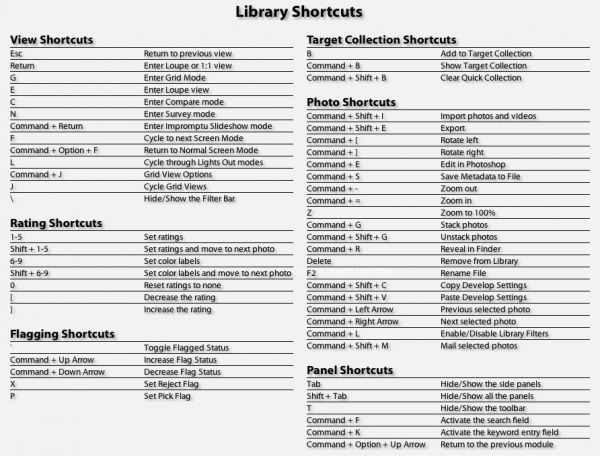
Lightroom has a help screen that will show you the keyboard shortcuts for the module you’re currently in. Look under Help > Lightroom Module Shortcuts, or use this keyboard shortcut:
Mac: CMD /
Windows: CTRL /
In additional to consulting this screen, I also recommend learning the shortcuts as you go. As you navigate a menu for a certain control, take note of the keyboard shortcut and try to use it next time:
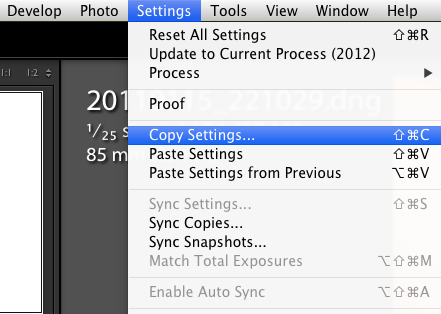
“Note to self, press SHIFT CMD C next time!”
Or when you reach for your mouse to access a tool in the interface, like the crop tool for example, hover over the tool and take note of the keyboard shortcut, then try to remember it for next time.
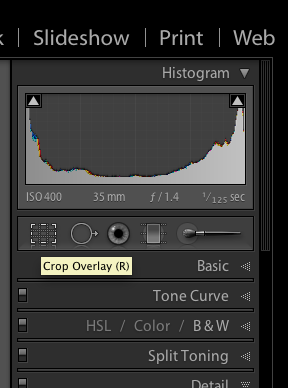
“Note to self, press R next time!”
This is a good way to teach yourself the keyboard shortcuts that are most useful for you in your own workflow. You’ll be learning them in the order that is most useful for you personally.
There are lots of keyboard shortcuts in Lightroom, but here are the ones I use the most:
Changing Modules and Views
E – Enter Loupe View
D – Enter Develop Module
G – Enter Grid View
Develop Module Shortcuts:
\ – Toggle before / after view
Q – Enter Spot Removal Mode
M – Enter Graduated Filter Mode
K – Enter Adjustment Brush Mode
V – Toggle between Black and White and Color
W – White Balance Selector
R – Enter Crop Mode
Shift CMD C (Shift CTRL C on Windows) – copy develop settings
Shift CMD V (Shift CTRL V on Windows) – past develop settings
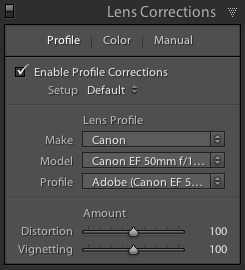
3. Enable Lens Correction at the end of your processing workflow
Lightroom includes lens profiles for many common lenses. Lens Correction works well to remove distortion and vignetting, especially from wide angle lenses. Sometimes this improves the image, sometimes it doesn’t.
If you choose to enable lens correction for a particular photo, enable it near the end of your workflow after you’ve made your other adjustments. Many of the controls in Lightroom, especially the Spot Removal tool and the Adjustment Brush, run more slowly with Lens Correction turned on.
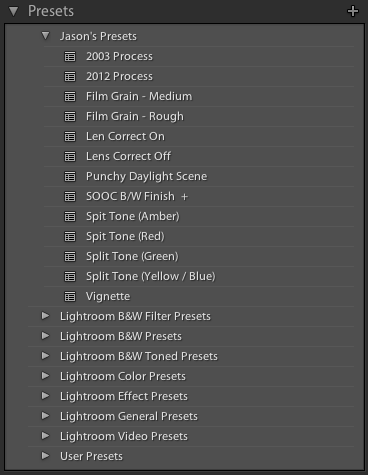
4. Create Develop Presets for commonly used settings
In addition to using develop presets to quickly apply a desired visual effect, I also use them to reduce the number of mouse clicks required to access certain controls in the GUI, for which there is no keyboard shortcut. This is particularly useful for changing process versions quickly, as mentioned in #1 above, or for toggling lens corrections on or off.
I’m basically using develop presets to pull some commonly used controls to the top of the GUI. It’s like creating a custom button.
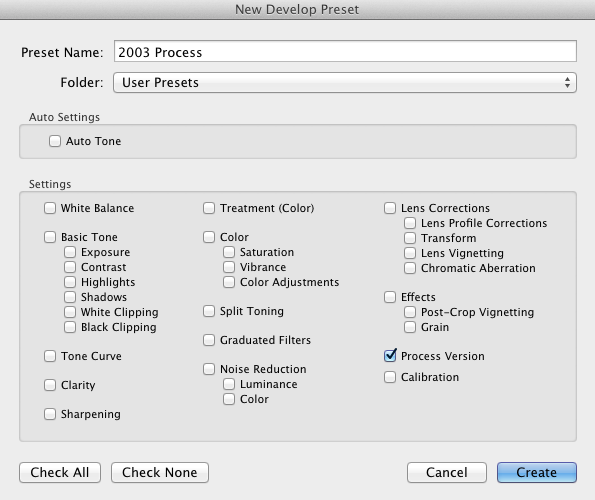
To create a Develop Preset:
1. Apply some settings to a photo in the develop module.
2. Navigate to the Develop menu and select “New Preset…”
3. Check the box next to the settings you want captured in the new Develop Preset
5. Shoot smaller files
This is not for everyone, and not for every situation, but there are times when you don’t need that full 18, or 22, or 36 megapixel Raw file. Depending on the project at hand, a 10mp file may be more than enough, and shooting smaller files are much faster to work with on the computer. Personally, I have a hard time letting go – when I shoot smaller files I always worry that I’m missing something. But it’s worth considering a smaller file size from time to time. What are you going to do with the photo? If you have a specific usage in mind and you know that you don’t need the full resolution your camera can capture, try shooting a smaller size.
I hope this article has been helpful, and that you’ve found at least one trick that you can use to get a little faster in Lightroom. Studying and processing your photos improves your creative vision, which over time impacts your shooting decisions. So a solid post-processing workflow is essential to developing yourself as a photographer.
Post originally from: Digital Photography Tips.
Check out our more Photography Tips at Photography Tips for Beginners, Portrait Photography Tips and Wedding Photography Tips.
5 Tips for a Faster Lightroom Workflow
via Digital Photography School http://digital-photography-school.com/5-tips-for-a-faster-lightroom-workflow?utm_source=feedburner&utm_medium=feed&utm_campaign=Feed%3A+DigitalPhotographySchool+%28Digital+Photography+School%29
The issues you have raised are very important. Because it is important to keep these things in mind while photographing. Your photography has been nice. If the pictures could be edited, it would be more very beautiful.
ResponEliminaThank you so much sharing for your valuable information.
Clipping Path Asia
transparent background Photoshop